AWS Database Migration service (DMS) allows AWS customers to easily migrate production databases to AWS with minimal downtime.
With AWS DMS, you can perform one-time migrations, and you can replicate ongoing changes to keep sources and targets in sync.
AWS DMS automatically manages the deployment, management, and monitoring of all hardware and software needed for your migration. Your migration can be up and running within minutes of starting the AWS DMS configuration process.
It can handle homogenous migrations, such as Oracle to Oracle, as well as heterogeneous migrations, such as Oracle to MySQL.
This blog gets you started with heterogeneous database migration from Amazon RDS Oracle to Amazon Aurora with MySQL compatibility using AWS Database Migration Service and the AWS Schema Conversion Tool.
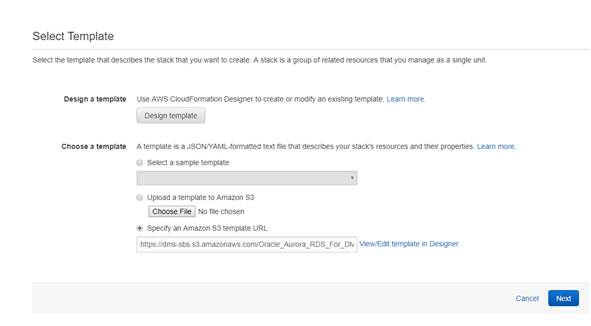
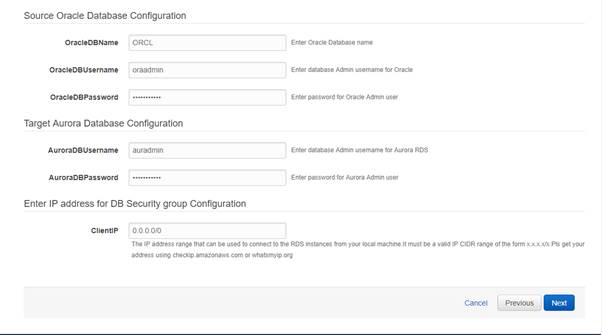
1) We will be deploying Oracle 12c SE Two License version 12.1.0.2.v4 as source database and use a cloudformation template to automate the creation of the source and target databases. In the Cloudformation console, create a stack with all the default settings(change the DB password) and provide the following S3 URL as the template location:
https://dms-sbs.s3.amazonaws.com/Oracle_Aurora_RDS_For_DMSDemo.template
2) After the stack is created, choose Stack, and from the Outputs tab, record the JDBC connection strings, OracleJDBCConnectionString and AuroraJDBCConnectionString, for use later in this walkthrough to connect to the Oracle and Aurora MySQL DB instances.
3) Next, you need to install a
SQL client for querying the source and target databases. We will be using SQL workbench for this walkthrough. Download SQL Workbench from its website, and then install it on your local computer.
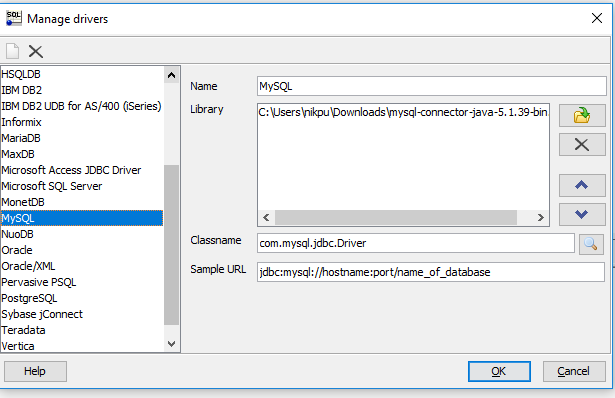
4) We also need to install Oracle and MySQL JDBC drivers and integrate them with SQL workbench. Download the Oracle Database 12.1.0.2 JDBC driver from the following link: https://dms-sbs.s3.amazonaws.com/ojdbc7.jar and the MySQL driver form this link: https://dms-sbs.s3.amazonaws.com/mysql-connector-java-5.1.39-bin.jar
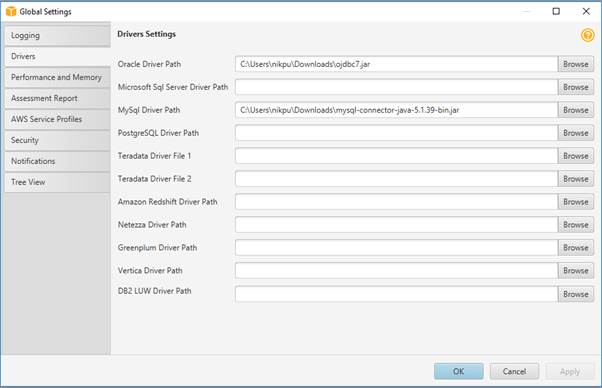
5) Launch the console of SQL workbench and provide the path of both the installed drivers under the Manage Drivers tab.
6) We would also require AWS Schema Conversion Tool which would convert the schema of the source database to the schema of the target database in the case of heterogenous database migrations.
7) Download the AWS Schema Conversion Tool from the following link: https://docs.aws.amazon.com/SchemaConversionTool/latest/userguide/CHAP_SchemaConversionTool.Installing.html. Once installed, launch it and in the Global settings tab provide the path of the installed JDBC drivers.
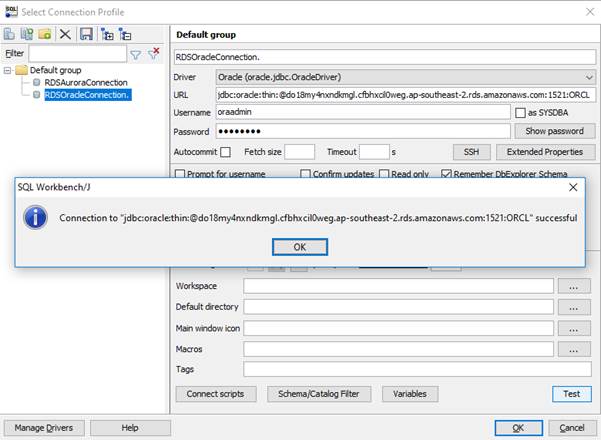
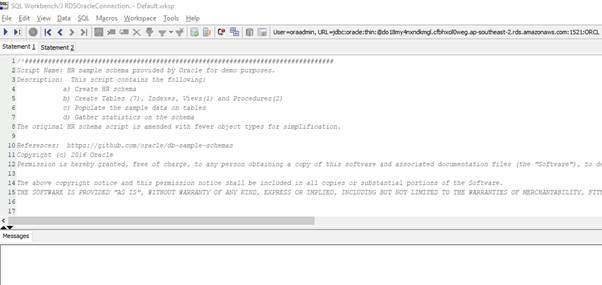
8) Now you need to populate your source database with some sample data for migration. In SQL Workbench, in the Connect Window tab, create a new connection profile and provide the JDBC URL, port, username and password of your oracle database so as to connect to it. Test the connection once and execute the following script from the following link: https://dms-sbs.s3.amazonaws.com/Oracle-HR-Schema-Build.sql to populate the source oracle database with sample data.
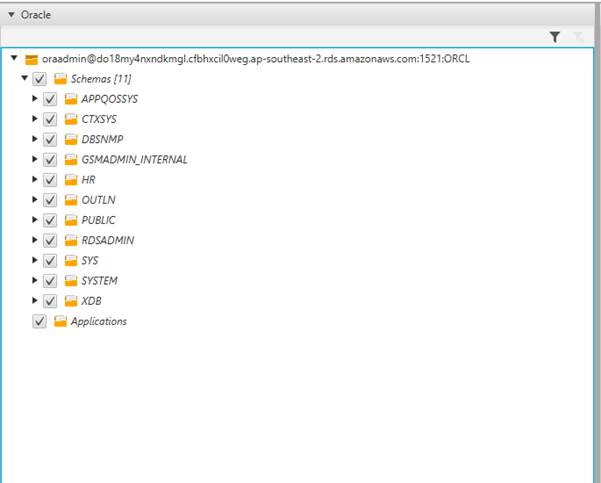
9) A schema named HR will be created consisting of seven tables. Optionally you can query your database to view the tables and data.

10) In SQL Workbench, create a new connection profile to connect to Aurora database, provide the JDBC connection string, port, username and password. After providing the details, test connection to the database.

11) In the AWS Schema Conversion Tool, create a new project and configure the source and target database engine. Connect to Oracle database by providing the necessary connection information and test the connection. Similarly, you also connect to the target Aurora database.

12) AWS SCT analyses the HR schema and creates a database migration assessment report for the conversion to Amazon Aurora MySQL. Right-click the HR schema and select Create Report. Check the report and the action items it suggests. The report discusses the type of objects that can be converted by using AWS SCT, along with potential migration issues and actions to resolve these issues.
13) Save the report as .csv or .pdf format for detailed analysis, and then choose the Action Items tab. In the action items, you will see the following issue: MySQL does not support Check constraints.
SCT automatically provisions triggers to simulate check constraints in Aurora MySQL database (Emulating triggers). For example, a check constraint for SAL > 0 in the EMPLOYEES table (in Oracle) is enforced with the help of before and update trigger statements in Aurora MySQL.
14) It is important to note that enabling the auto_increment option requires some additional steps via SCT because it, by default, converts all NUMBER (Oracle) data types into DECIMAL in Aurora MySQL.
Aurora MySQL doesn’t support auto_increment for the DECIMAL data type. Therefore, the data type of the primary key column and corresponding foreign key columns needs to be changed to one of the INTEGER data types such as INT, SMALLINT, MEDIUMINT or BIGINT as part of the schema conversion.
We will use mapping rules to achieve this transformation. Specify the Mapping rule for Data type conversions as shown below:

15) After fixing the problem areas in the schema conversion, we will finally go ahead with it. Right-click the HR schema, and then choose Convert schema.
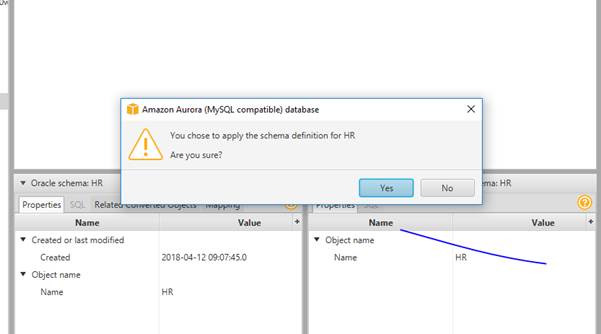
16) Choose the HR schema on the Aurora side, and then choose Apply to database to apply the schema scripts to the target Aurora MySQL instance.
17) You can optionally validate the schema conversion to compare the objects found in the Oracle and Aurora MySQL databases using SQL Workbench.
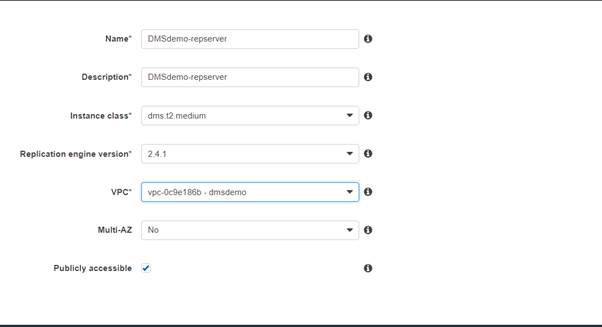
18) After the schema conversion, we proceed to the core part of this walkthrough, which is the data migration. A DMS replication instance performs the actual data migration between source and target.
In the AWS console, you start by creating the replication instance, while it is getting created you can specify the source and target database endpoints and test the connectivity to them after the replication instance is up and running.
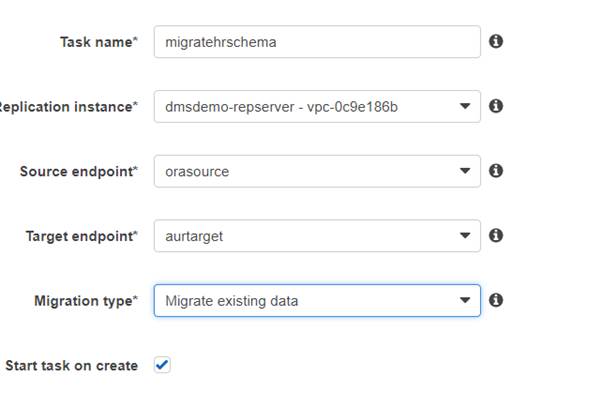
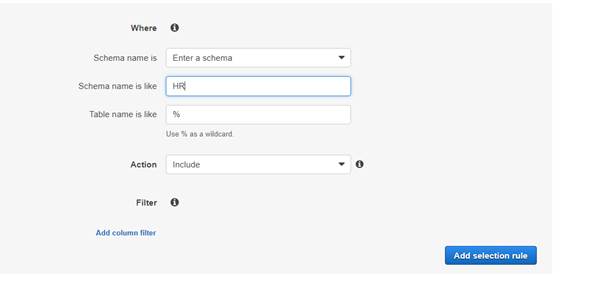
19) Next and the final step of the migration involves creating a DMS task. Using a AWS DMS task, you can specify what schema to migrate and the type of migration. You can refer to the below screenshots for configuring your task.
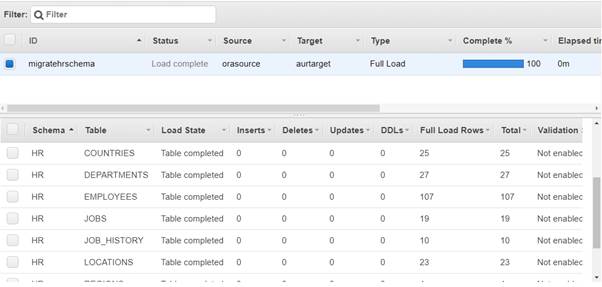
20) When the migration task completes, you can compare your task results with the expected results in the Table Statistics tab of your task. You should see an output similar to the below screenshot.
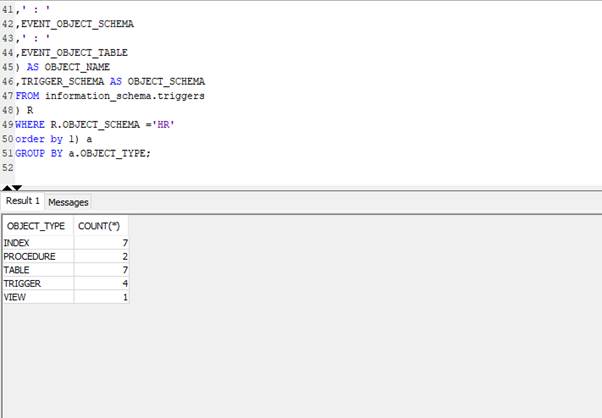
21) Connect to the Amazon Aurora MySQL instance by using SQL Workbench, and then check if the database tables were successfully migrated from Oracle to Aurora MySQL by running the SQL script shown following.

Now you have successfully completed a database migration from an Amazon RDS Oracle DB instance to Amazon Aurora MySQL.
Contributed by : Nikita Punjabi
https://www.linkedin.com/in/nikita-p-221406162/